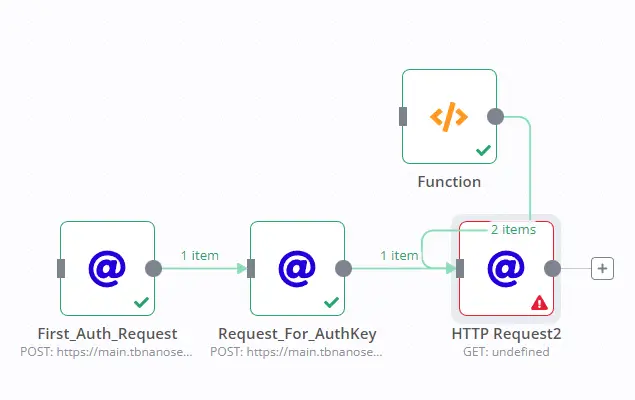
You want to connect n8n to any web service or API. The key to unlocking this power is the HTTP Request node. This node is your direct line to the internet from your workflows. You can fetch data, send information, and automate interactions with thousands of apps. To master n8n HTTP Request node for powerful workflows, you need to understand its core setup and practical uses. This guide provides clear, actionable steps. You will learn how to configure the node and apply it to real-world automation.
Table of Contents
What the n8n HTTP Request Node Can Do for You
The HTTP Request node is a foundational tool in n8n. It lets you make calls to any API endpoint. You are not limited to pre-built app connectors. This opens up endless possibilities for your custom integrations. You can pull data from a private company API. You can send a POST request to a webhook URL. You can even automate interactions with services that don’t have a dedicated n8n node. It gives you full control over your data flow. Mastering this node means you can automate virtually any online service.
How to Configure Your First HTTP Request Node
Start by dragging the HTTP Request node onto your canvas. Connect it to a trigger node, like a schedule or webhook. Double-click the HTTP Request node to open its settings. The configuration pane is where you define your request. Here are the essential fields you must set.
- Method: Choose the HTTP method. GET retrieves data. POST sends data. PUT updates data. DELETE removes it.
- URL: Enter the full endpoint URL of the API you are calling.
- Authentication: Select the type your API requires. Common choices are Header Auth, Basic Auth, or OAuth2.
- Headers: Add key-value pairs if the API needs specific headers, like
Content-Type: application/json. - Query Parameters: Add parameters for filtering GET requests directly in the URL.
- Body: For POST or PUT requests, add the data you want to send, usually in JSON format.
Test your configuration using the “Execute Node” button. View the response in the output panel on the right. Check for errors and adjust your settings until the call works.
Build Powerful Workflows with the HTTP Request Node
Your goal is to create automated sequences. The HTTP Request node acts as a bridge. It fetches or sends data between different steps. You can process the data with other n8n nodes. Then, you can use another HTTP Request node to send the results elsewhere. This chain reaction creates powerful, multi-step automations. You move data from point A to point B without manual work.
Master n8n HTTP Request Node for Data Aggregation
A common use is pulling data from multiple sources into one report. For example, you can create a daily dashboard. Use one HTTP Request node to fetch sales data from your e-commerce API. Use a second HTTP Request node to get support tickets from your help desk API. Then, use the Code node or a spreadsheet node to combine this data. Finally, send a formatted summary via email or Slack. This workflow turns several manual checks into one automated report.
Master n8n HTTP Request Node for Two-Way Sync
You can also keep two systems in sync. Imagine you add a new contact to your CRM. You want them added to your email marketing platform automatically. A workflow can start when a new CRM contact is created. The HTTP Request node can take that contact’s data. It then sends a POST request to the email platform’s API to create a subscriber. This is a two-way, live sync that you built yourself. You controlled the data mapping and the timing.
Handle Authentication and Manage Secrets Securely
APIs require secure access. The HTTP Request node supports all major authentication methods. You will often use API keys. Never hardcode these keys directly in the node configuration. Instead, use n8n’s credentials system. Click the gear icon next to the authentication field. Create a new credential with your API key. n8n stores this securely and encrypts it. You then reference this credential in your node. This keeps your secrets safe and makes your workflows shareable.
Parse and Process the Response Data Correctly
The API response comes back to your workflow. You must handle this data to use it in the next step. The HTTP Request node offers two main response formats.
- JSON: The most common format. n8n can automatically parse JSON into a structured object. You can then access specific fields like
{{$json["id"]}}in subsequent nodes. - String: For non-JSON responses, like XML or plain text. You may need to use the “Convert to JSON” option or a Code node to structure the data.
Always check the response format in the API documentation. Use the n8n UI to inspect the output data. This shows you the exact structure to reference later.
Implement Robust Error Handling in Your Workflows
APIs can fail. Servers go down. Rate limits get hit. Your workflows must handle these errors gracefully. The HTTP Request node has built-in settings for this. Enable the “Continue on Fail” option. This allows your workflow to proceed even if this node errors. You can then connect an “Error Trigger” node branch. This branch can send you an alert via email or a messaging app. It can also retry the request after a delay. This makes your automations reliable and professional.
FAQ on the n8n HTTP Request Node
What is the difference between the HTTP Request node and a dedicated app node?
A dedicated app node is pre-built for a specific service. It is simpler but less flexible. The HTTP Request node works with any API. It requires more configuration but offers complete control.
Can I use the HTTP Request node to connect to a private/internal API?
Yes. You can use it to call any API reachable from your n8n instance. For internal networks, ensure your n8n server can access the private API endpoint.
How do I handle pagination with the HTTP Request node?
Many APIs split data across multiple pages. You can handle this by using n8n’s “Paginate” option in the node. Alternatively, you can use a loop to call the next page URL until all data is collected.
Is it safe to send sensitive data with this node?
The connection uses HTTPS for encryption in transit. Always use n8n’s credentials system for API keys and secrets. Avoid placing sensitive data directly in the node’s parameters.
Conclusion: Unlock Your Workflow Potential
You now have the knowledge to master the n8n HTTP Request node for powerful workflows. Start with a simple GET request to an API you know. Experiment with the response data. Then, build a chain that sends data to another service. Remember to handle authentication securely and plan for errors. This single node dramatically expands what you can automate. You are no longer confined to pre-built connectors. You can integrate any tool with an API. Take these steps and start building your custom, powerful automations today.